
Gah! There’s nothing quite as annoying as having to stop your bike ride to fix your slipping seat post. While half an inch slippage doesn’t seem like a lot, us experienced bikers know very well that it is.
If you’ve tried tightening your seat post as hard as you can, don’t try to tighten it anymore. There’s a different problem going on here and over tightening your seat post clamp is only going to make things worse, especially with carbon.
On the other hand, make sure you are actually tightening your quick release clamp. For beginner riders, it’s a common mistake not to close the clamp all the way. A good rule of thumb is that it should fold all the way in and leave an imprint on your hand.
The good news is there’s often some easy fixes to prevent a slipping seat post.
There are a few different reasons why your bike seat keeps sliding down. This can be anything from manufacturing defects to excess grease to a poor fitting clamp.
Here are some causes and fixes for a slipping seat post:
Double Check The Seat Post Size
The first thing you’ll want to make sure of is that your seat post and seat post tube sizes actually match. You might be thinking, “of course they match!” But there have been cases where the seat post measurement were wrong. Crazy, right?
To start, check to see if the size is printed on the seat post. If you have an old bicycle and unsure of the size, you can start by finding it’s age. Once you know the year and model, you can use this seat post size lookup page to find it’s size.
But don’t just trust the label or manufacture claim. Different manufactures will have different tolerances and sometimes defects. The printed size might not always match the actual size.
Here’s one Trek cyclist who found the frame size to be wrong:
Check the frame. I saw a Trek top fuel carbon frame recently that would not hold the seatpost well. I measured the frame and it was about 0.1mm oversize. I ended up shimming it with a piece of paper and it was fine.
I’ve had a few slipping seat posts and all were Thompson and slightly under spec.
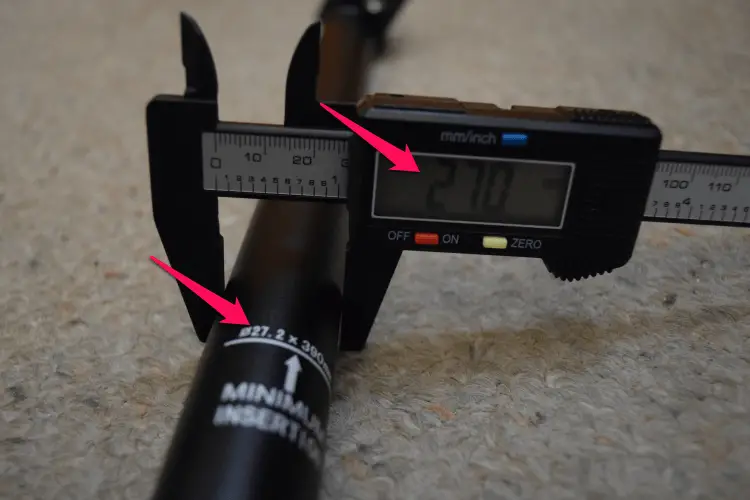
The easiest and most accurate way to measure your seat post and tube is with calipers. Here are the calipers I personally use. I got these off Amazon for a really good price. What’s good about these is they are stainless steel and have ±0.01mm accuracy. If you get a cheaper kind, they might be ±0.2mm accuracy which doesn’t help. If you don’t have any already in your toolbox, try picking up a pair (Amazon link).
So how do you measure the seat post and tube to make sure they match?
It’s pretty simple. Seat posts are measured using the outside diameter of the seat post to match with the inside diameter of the seat post tube. These two measurements need to match. If they are off by just 1 mm, this can cause slippage. This is why you don’t want want to over tighten your post and cause damage.
Keep in mind, if your seat post is more oval-shaped, it will measure differently depending on where you measure. Also important to measure where
Seat post measurements generally range from 22 mm to 35 mm in 0.2 mm increments. The most common diameter size is 27.2 mm. If you find a measurement that isn’t in 0.2 mm increments, it could mean something is wrong.
Oh, and while you’re at it, it’s not a bad idea to check for cracks.
Clean Your Seat Post
If you know you have the right size post, try cleaning the post and tube. Yes, even if you even have a brand new bike.
Sometimes saddle posts have way too much grease on them. While some grease is fine, too much can cause your saddle to slip. In some cases, wiping off excess grease may just do the trick.
Treks are apparently notorious for being very slippery:
I used to work at a shop that sold Treks….they’re NOTORIOUS for the seatpost slipping. Take a rag and wipe off any excess grease that might be there. Shim it for now if you have to, and try to get a replacement (NOT a direct Trek replacement) from your LBS. I think part of the problem is the finish on the seatpost itself.
When it comes to cleaning, you’ll want to remove your seat post and clean everything. And when I say everything, I mean:
- The seat post
- Top of the seat tube
- Inside the seat tube (as far down as you can go)
- Seat clamp and accompanying bolts and threaded inserts
Sometimes parts that you don’t think are dirty can be. Your back tire is going to kick up lots of debris and dirt toward your bike seat. If you want to keep your seat clean and prevent that long wet streak along your back, consider picking up some fenders.
You can use a rag and some degreaser to make sure everything is clean. If you have metal parts (non-carbon), using an anti-seize compound can be a good idea.
Tip: Never use grease on a carbon frame or carbon seat post. Carbon can absorb the grease and cause it to swell.
Once everything is cleaned and properly greased, give it another go. Having grease on the bolts will allow you to tighten without having to apply as much torque.
Apply Carbon Paste
Carbon paste or carbon compound is a gel with tiny beads suspended in it that help with friction. This is especially useful for carbon. Carbon can’t take as much force as metal, so carbon paste allows you to hold parts together by using less torque.
Here’s a helpful video of how to apply carbon assembly to carbon bike parts:
One of the most popular products is Carbon Paste by Finish Line (Amazon link). It seems to do a pretty good job:
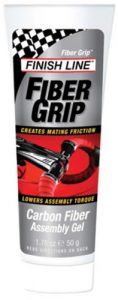
My girlfriend had a slipping post which I used Finish Line Fiber Grip on and it worked.
Tweak or Rotate Your Seat Post Clamp
Believe it or not, closing your quick release too much can have the opposite effect. Try not closing it all the way and see if it helps.
It helped this rider who had a sliding seat post:
BTW, that tip about not closing the QR all the way helped.
Another trick is to turn the seat post collar 180 degrees. If your clamp, tube, or post are slightly bent, this can give it another spot to tighten onto.
A friend of mine had the same problem. Turning the seatpost collar 180 degrees from the original position worked for him.
I turned it 180 degrees so the two slots line up, torqued the bolt, and it has not slipped since.
Replace Your Seat Post Clamp
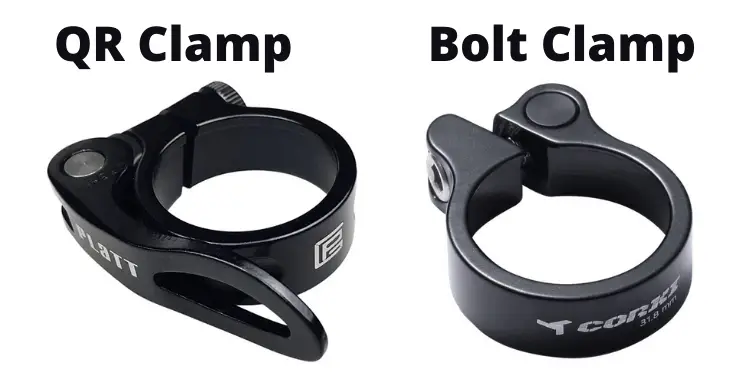
If you tried everything else, you might just need a new seat post clamp. Your quick release might just be old or not very good to begin with. Especially with cheap QRs, they can get worn down with use and will eventually need replacing. If your QR is more than a few years old, consider replacing it.
As much as I love quick release, bolt down clamps are going to be a better fit. If you don’t need your quick release saddle clamp, look into getting a bolt down one. Double bolts are even better and are used on mountain bikes. Thicker clamps will help too.
If you want to stick with a QR, Salsa clamps are a popular choice. Pick some up at Competitive Cyclist.
Stock QR’s are usually junk. I had similar problems as you. Tried a cheap nashbar QR and still had problems. Then switched to a Salsa QR. Problem 100% gone. It’s far easier to close then the cheapo, and hasn’t slipped once.
There’s also a few good seat post clamps on Amazon. Have a few popular ones I found:
- Wolf Tooth Seatpost Clamp (single bolt)
- Platt Bike Seat Clamp (quick release)
Remember to get the right size clamp for your seat post tube.
Lastly, Try the DIY Option
If you really want to try to save your saddle (even though bike seats are interchangeable), there’s a few more things to try.
One solution is to bring your post to a machinist. One cyclist had some luck by getting his seat post knurled. This is basically adding tiny little “grooves” to the metal for added friction.
And as odd is it sounds, adding hand grip chalk or hairspray to your post may just give it the grip it needs.
Hair spray. To my surprise, it worked and the seatpost stopped slipping, creaking, and annoying me.
These are unconventional fixes, so use them at your own risk.